Introduction
You’ve likely stumbled upon eye-catching CGI renders in architectural showcases, product demos, or even social media ads and you might be thinking, “That level of polish is way beyond my reach.”
It may feel like 3D rendering requires a steep learning curve, proprietary tools, and a high-end workstation, but that assumption could be holding you back from exploring a creative skill set that’s increasingly accessible.
Perhaps you’re an architect eager to visualize designs without outsourcing, a game developer curious about bringing your levels to life, or a designer seeking more control over client presentations.
Whatever your background, you may find that the process isn’t as daunting as it first appears. We’ll focus on real-world workflows and common stumbling blocks because knowing where beginners tend to trip up can help you stay on track and avoid frustration.
By centering your experience, we aim to provide you with practical, hands-on advice instead of abstract theory.
You’ll discover which software combinations work best for different goals, how to optimize hardware so you don’t waste time waiting on renders, and ways to refine your lighting and materials from day one.
In this 3D Rendering Beginners Guide, we’ll walk you through every step—from understanding core concepts to setting up your first scene.
Drawing on real-world experience at 3D Rendering World, we’ll share practical tips, cautionary tales, and essential resources so that you can start creating your own photorealistic images with confidence.
What Exactly is 3D Rendering?
When beginning any new project, it’s important to understand the fundamentals. So what exactly is 3D rendering? In simple terms, it is the process of taking 3D models made in programs like Maya, 3ds Max, or Blender and generating 2D images and animations from them.
But it involves so much more than just pressing a button. To breathe life into these assets, an artist must carefully craft materials, and light scenes, adjust cameras, and tweak endless settings to achieve the perfect look.
At its heart, 3D rendering is the process of converting a digital three-dimensional scene into a two-dimensional image or animation. Think of your computer’s graphics pipeline as a virtual camera: you model objects, assign materials, place lights, and then “shoot” the scene.
The rendering engine calculates light interactions, shadows, reflections, and textures to produce the final frame. It might surprise you how many invisible calculations happen behind the scenes:
• Geometry Processing: Triangles, vertices, and mesh data define shapes.
• Material Shading: Surface properties like glossiness, transparency, and subsurface scattering determine how objects look.
• Lighting Computation: Direct and indirect light bounces simulate realistic illumination.
• Post-Processing Effects: Color correction, bloom, and depth of field add cinematic polish.
Types of 3D Rendering
There are a few common types and methods of 3D architectural rendering, including:

- Real-Time Rendering
The 3D assets are rendered on the fly as the camera viewpoint moves around the scene. This allows for quick iteration and animation but has simplified lighting and materials.
- Pre-Rendered Visual Effects
For visual effects shots in live-action films, animation studios will pre-render complex 3D assets individually as frames. These are compiled and integrated with plates during compositing. Pre-rendering enables high quality imagery not possible in real-time.
- Offline Rendering
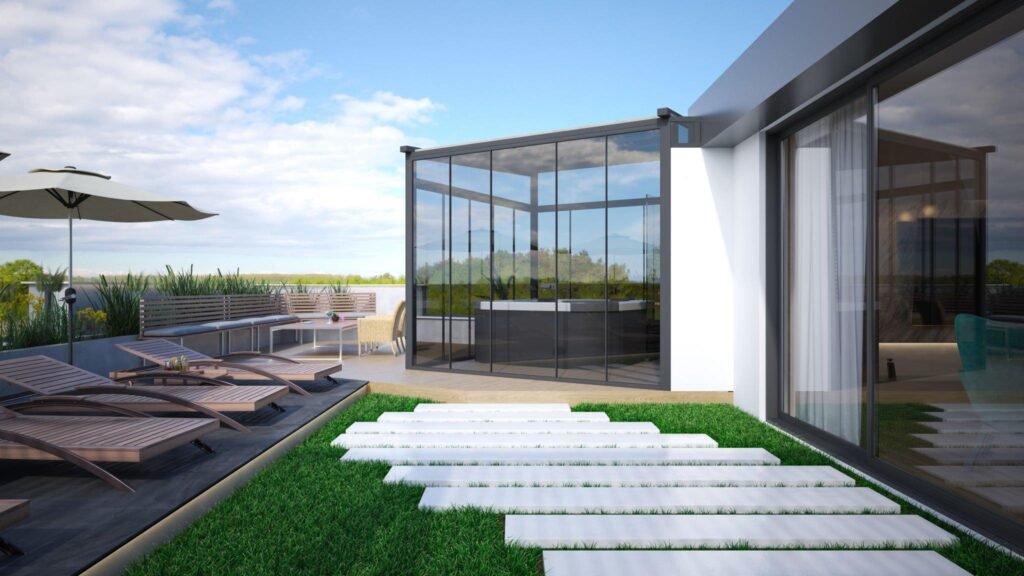
Offline rendering is used for still images requiring high realism and detail. This includes architectural visualizations, product renderings, automotive designs, and advertising. Scenes are set up in a 3D program then rendered using ray tracing, global illumination, and other complex techniques.
Offline engines (V-Ray, Corona, Arnold, Redshift) focus on absolute image quality, using techniques like path tracing to simulate millions of light rays. Advantages include:
• Superior global illumination and realistic caustics.
• Fine-tuned control over sampling and noise reduction.
• Support for elaborate volumetric effects and cinematic motion blur.
The trade-off is time: a single high-resolution frame can take minutes or hours to render, depending on your settings and hardware.
- Non-Photorealistic Rendering
While most aim for photorealism, non-photorealistic rendering applies artistic styles and abstraction to 3D models. This includes cel shading, painterly rendering, hand-drawn looks, and other stylized effects.
Essential Tools for 3D Rendering
Two primary types of software are needed for 3D rendering:
- Modeling Programs: These create the 3D models and assets. Common options include Maya, 3ds Max, Blender, ZBrush, and Modo.
- Render Engines: These generate the final pixels and images from scene setups. Common engines include V-Ray, Arnold, Redshift, Octane, and Cycles.
Other helpful programs add capabilities for texturing, lighting, animation, cloth, hair, and compositing. Examples are Photoshop, Marvelous Designer, Houdini, and After Effects. Game engines like Unity and Unreal provide real-time rendering capabilities.
Overview of the 3D Rendering Process
While every artist follows their own unique workflow, 3D rendering typically involves these key steps:
- Modeling: Creating 3D models and assets out of polygons
- Texturing: Adding color, surface textures, and material properties
- Rigging: Building bone structures and controls for characters and objects
- Animation: Posing and animating the models over time
- Lighting: Illuminating the scene with light sources, shadows, and reflections
- Rendering: Generating the final 2D images from the set up 3D scene
- Compositing: Combining rendered elements and enhancing the final images
Together, these steps take 3D assets from start to finish to achieve the desired visual look and style. In the following sections, we’ll go over some tips to start learning these key phases of the 3D rendering pipeline.
Tips for Getting Started with 3D Rendering

For beginners new to 3D rendering, here are some helpful tips:
- Master the basics of 3D modeling before jumping straight into rendering. Start simple before increasing scene complexity.
- Study real-world lighting and use photo references when texturing to achieve realistic results.
- Learn about PBR (physically based rendering) and how to use it.
- Leverage existing asset libraries to save time instead of modeling everything from scratch.
- Watch speed modeling/sculpting videos to quickly learn techniques from experts.
- Experiment with different rendering software and try real-time engines first to get instant feedback.
- Start with simple scenes before advancing to highly complex environments.
- Rendering takes patience and practice – keep at it!
Conclusion
You may still wonder if diving into 3D rendering is more of a leap than a logical step for your creative journey. It might feel that mastering complex software, perfecting PBR materials, and orchestrating believable lighting is reserved for seasoned artists.
Yet as you’ve seen in this 3D Rendering Beginners Guide, a measured, hands-on approach can strip away much of that intimidation and it appears that progress often comes faster than you expect when you tackle one concept at a time.
It’s believed that your early renders won’t match studio portfolios and that’s perfectly okay. Those first noisy shadows, blown-out highlights, or misaligned textures are less mistakes than signposts pointing you toward refinement.
Each low-resolution draft teaches you about sampling settings, camera composition, and material calibration in ways that a single tutorial or slideshow never could. Embrace those imperfections; they guide you toward deeper understanding.
Perhaps the most powerful takeaway is that 3D rendering isn’t simply about pixels on a screen, it’s about translating your ideas into immersive experiences that resonate with clients, collaborators, and yourself.
When you craft a scene where light dances off polished surfaces or where volumetric haze suggests morning mist, you invite viewers into a shared vision of your design. It may seem ambitious, but even small, well-lit scenes can evoke powerful emotional responses and build confidence in your work.
So if you’ve hesitated, ask yourself:
what might happen if you rendered that first frame today?
With a supportive community, thoughtfully chosen resources, and a willingness to iterate, you may find that the path from curious beginner to confident visual storyteller is not only achievable but also deeply rewarding.
Happy rendering! Your next breakthrough could be just one thoughtful light test away.
Frequently Asked Questions
3D rendering is useful because it allows the creation of realistic imagery from 3D models that would be impossible to capture in real life. It enables artists to have full control over lighting, camera angles, materials, and other qualities to achieve the perfect look. Rendering takes digital 3D assets to the next level for films, games, product visuals, architecture, and more.
Some common types of 3D rendering include real-time rendering for interactive applications like games, pre-rendered VFX for movies and shows, photorealistic offline rendering for product visualization and architecture, and non-photorealistic/stylized rendering. Each approach serves a different purpose.
Modeling and rendering are separate because they require different skill sets and workflows. Modelers focus on crafting the 3D assets while renderers focus on lighting, shading, textures, and cameras. Separating them allows each specialized team to control their part of the pipeline.
A good 3D rendering convinces the viewer that the assets and scenes are realistic. This is achieved through accurate lighting, crisp focus, natural textures, correct physically-based materials, compositing, and subtle details that replicate the real world.
Rendering times vary substantially based on scene complexity. A single frame can take under a minute to over 24 hours. Simpler scenes and real-time rendering are faster, while complex lighting and effects increase render times for production-quality imagery.
A 3D rendering artist needs expertise in modeling, lighting, shading, texture/material creation, animation, visual arts principles, composition, color theory, software proficiency, and technical problem-solving skills. Creativity and artistic sensibilities are equally important.
Best practices for learning 3D rendering include studying real-life lighting, textures, and materials, starting simple and adding complexity over time, mastering foundations before specialized workflows, practicing through experimentation, seeking feedback, and utilizing online tutorials and existing assets to advance.
To get started with 3D rendering, start by learning modeling fundamentals, download trial versions of leading software like Maya and Blender, watch beginner tutorials to familiarize yourself with the interface and tools, start the simple scene and asset building, research rendering techniques, and join online communities to ask questions and get critique.